Categories
SEO

A Complete Guide to How to Do Quick and Easy Keyword Research

Even the most talented content marketers and writers struggle with one of the most essential parts of creating successful content – keyword research. Sure, there are several tools out there to help make the job easier, but for many, it’s a monotonous task and you can never really be sure you chose the best possible keywords for your content.

I’m here to tell you that you don’t need to spend hours pouring over countless tools worth of search data to determine topics for your articles. In fact, spending too much time on it can cause you to get stuck – spending more time in analysis mode than actually producing content – and if that’s what you’re best at, that’s what you need to be spending the most time on.

Let me show you how to get the keyword research done quickly and effectively so you can move on to crafting content that speaks to your audience.


Why You Must Spend Time on Keyword Research

Unless you’re spending time on keyword research, you’re taking shots in the dark about what your audience is looking for, and what your competition is doing to get their attention with those keywords. It may be your least favorite part of the job, but it’s necessary for the best results.

You may find there’s a widely searched keyword that others aren’t providing a good answer for. When you discover that kind of low hanging fruit, you can create a piece of content that drives a lot traffic – and hopefully conversions – to your website. You don’t always have to think of the ideas yourself to be successful. The data can point you in the direction of a hit if you know how to use it.


1. Focus on Blog Categories

Organizing all your blog posts into five to 10 categories can help improve your rankings for the popular topics in your niche. It also helps your readers find more relevant content, and keeps your blog organized.

Start by evaluating top websites in your industry. Find the most common items in their navigation menus, and take a peek at their blogs to see what categories they’re using. If you look at this blog, you’ll see our categories are: digital marketing, content marketing, SEO, social media, and outreach. We also have a topic for company news, but that’s not a main focus of the content I create for the blog.

Use Google’s advanced search operators to dig deeper in the top industry sites for extra little nuggets that could be useful to you.

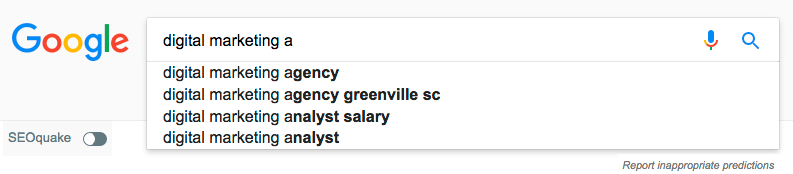
Next, turn to Google Suggest to get some ideas. Search for your main topic, but don’t press enter. Make note of what you see in the drop down. That’s what Google knows to be the most common searches, so you should use that to your advantage. If you have time, or you’re just curious, you could also search, without pressing enter for “keyword a” “keyword b” and so on to get suggestions associated with your keyword and each letter of the alphabet.


2. Check the Google Keyword Planner

Now, take your aggregated keyword list, and use the Google Keyword Planner to figure out which of them are the most popular based on average monthly Google searches.

Step 1: Paste your keyword list into the box and click “Get ideas”.

Step 2: Evaluate the search volume for each phrase and save it, keeping in mind the limited data. Also consider that Google may change your keywords slightly, so it’s important to pay attention when you’re choosing what to name your blog categories. Sort your keywords from highest to lowest monthly search volume to make sure you don’t miss anything that could be a valuable category.


3. Check the Moz Keyword Explorer

Before you finalize your list of categories, take a look at Moz Keyword Explorer. Create a new list in Moz and paste your list of keywords in the “Enter Keywords” box. Once the data comes back, sort by average monthly search volume, and choose the ones you believe are the most popular and relevant to your site. Choose the main categories, and then choose others to use as subcategories if you want.


4. Take a Look at Answer the Public

Here I am again, talking about one of my favorite keyword research tools. Answer the Public gives you access to questions people are asking related to keywords. It’s a great way to come up with content for a FAQ page, or come up with topics for blog posts.

All you have to do is search for your product or service. If we continue with the digital marketing example, we’re presented with questions like:

  • what are digital marketing trends
  • we are digital marketing
  • what are digital marketing metrics
  • what are digital marketing agencies
  • what are digital marketing jobs
  • what are digital marketing essentials
  • what are digital marketing skills
  • what are digital marketing tactics
  • what are digital marketing objectives
  • what are digital marketing solutions
  • what are digital marketing
  • what are digital marketing services
  • what are digital marketing platforms
  • what are digital marketing activities
  • what are digital marketing campaigns
  • what are digital marketing strategies
  • what are digital marketing techniques
  • what are digital marketing tools
  • what are digital marketing channels
  • are digital marketing certification worth it


And that’s just some of the “what” questions. That doesn’t cover the how, why, who, when, or where questions you can use to generate content. You can filter them out however you’d like, and export the data into a CSV for easier tracking or inclusion in your editorial calendar.

Now, add the questions to a keyword list in Google Keyword Planner and Moz Keyword Explorer. Repeat the steps above to check the search volume and choose the ones you want to focus on.


5. Research Your Competition

Go to SimilarWeb. Search for your competitors and look for their 10 most popular pages. Take the time to evaluate each one of those pages and derive insights about why they are most popular for the audience. This helps you in creating a strategy that not only meets your audience’s needs, but ensures you do it in such a way to stand out from the competition.


6. Take the Keywords and Run

Once you know what keywords you’re working with, you’re ready to start working on an editorial calendar and cranking out content. The entire keyword research process should take you less than an hour – if you can manage to resist the urge to avoid Facebook, YouTube, and other time-sucking distractions, anyway.

And if you really want to get ahead, check Google Trends for seasonal content ideas – and get the content out there months before the spikes. This way, it has time to rank and is there waiting for people to find it.

What’s your stance on keyword research? Love it? Hate it? Hire someone else to do it? Tell me in the comments below.

Categories
SEO

A Complete Guide of the Best Practices for URL Redirects

A redirect tells search engines and users to a different URL from the one they originally asked for. They are necessary when making changes to a website’s URL structure, or when moving content from one domain to another. You can use them to associate common web conventions (http://, www., and so on) with one another to help maximize domain authority.

When implemented correctly, little to no ranking is lost, but if not done right, a website can lose most of, if not all, its clout with Google and other search engines. This guide explains the types of redirects and how to implement them.


301: Moved Permanently: Best Choice for SEO

A 301 redirect permanently redirects from one URL to another. It passes 90% to 99% of the link juice, or ranking power, to the redirected page. 301 is the HTTP status code for this kind of redirect. Most of the time, this is the best kind of redirect for a website, since it helps keep all current SEO ranking in place.

The 301 tells browsers and search engine crawlers that the page has changed location, and the content, or at least an updated version of it, can be found at the new URL. This allows all link weight from the original page to the new URL.

Transferring content will become more complex if you choose to change your site’s domain, or move content from one domain to another. As a result of spammer abuse, if you’re using 301 redirects between domains, it takes more time for them to be implemented.


302: Found/Moved Temporarily

In HTTP 1.1, this is known as 302 Found, and in HTTP 1.0 it was known as 302 Moved Temporarily. Though some Google employees say there are instances where both redirects are treated in a similar manner, Moz says the best way to ensure you maintain all your SEO credit is by using a 301.


307: Moved Temporarily

In HTTP 1.1, the 307 code comes into play for Moved Temporarily.  While most crawlers treat it like a 302 in many situations, it is almost always best to continue to use the 301 redirect. The only situation where you should use the 307 redirect is when you really have only moved the content temporarily, such as when your website is undergoing maintenance, and the server has been identified as HTTP 1.1 compatible. It’s fairly difficult to determine whether or not the search engines can determine a page is compatible, so it’s best to use a 302 redirect on content that you’ve moved on a temporary basis.


Meta Refresh

A meta refresh is a type of redirect executed at the page level, rather than the server level. They are generally slower, and therefore not recommended for SEO purposes. They are most often associated with the “If you are not redirected within five seconds, click here” messages seen on many websites. A meta refresh will pass some link juice, but isn’t the best choice for SEO because you will lose a lot of link juice and because of poor usability.


Redirect Best Practices

Redirects have three core parts: the source, the type, and the destination. The source is the page you don’t want your audience to see. The type refers to whether it’s a 301, 302, or 307. The destination is the new page that you do want your audience to see.

When you move a site or a section of a site, implement 301 redirects on a one to one content basis. If you have three URLS, A, B, and C, A should have a redirect to A’s new location; B should have a redirect to B’s new location, and C should have a redirect to C’s new location.

Make sure you double check and triple check your robots.txt file to make sure you’re not blocking the redirecting URLs.

Remember, each redirect adds another request to your browser, meaning it will take additional time for your website to load. Don’t chain a lot of 301 redirects together – pointing one old URL to another old URL to another old URL before getting to the new one. If the chain gets too long, search engine bots won’t even follow it. You want a website that loads quickly and easily, both for user experience and search ranking purposes, and redirects are one of many factors that affect website speed.

Use the rel=canonical tag to indicate to search engines that what they see is not the official version of the page. This is ideal when you want people to be able to see and access both versions of a page, but only one version accessible and visible to search engines. This is the best way to address multiple versions of a page or piece of content – such as when you have a print version of an article, or you have multiple products that can fit into a single color category. You’ll want to do this for any content you’ve released for syndication on other blogs or websites, too. Don’t abuse the tag, however. Use it only when you want to avoid duplicate content issues.


Implementation Method 1: Editing Your Site’s .htaccess File (Apache Servers Only)

If your host allows access to your .htaccess file, open the file from your FTP program. The file is hidden by nature, so make sure your program is set to allow you to view hidden files.

Add a line in the file for each redirect. This tells the server what you want it to do. If you want to redirect a page use:

RedirectPermanent /old-file.html http://www.domain.com/new-file.html

If you want to redirect an entire domain, use:

RedirectPermanent / http://www.new-domain.com/

When you’re finished adding all your redirects, make sure there is a blank line at the end of the file. This is to tell the server you’re finished with the file, since it will read everything line by line.


Implementation Method 2: Using IIS (Windows Server Only)

If you’re using a Windows server and have access to the administrative tools, navigate to the Internet Information Services (IIS) Manager. Choose the site you want to work on from the panel on the left-hand side.

You’ll need to have the URL Rewrite module installed. If you do not, install it on your server first. Once installed, double click to open it.

On the right-hand side, click “Add Rules.” From there, choose “Blank Rule.” You should see it under the “Inbound Rules” section. Type a name for your rule.

Now, go to the Match URL panel. Set the requested URL to “Matches the Pattern” and “Using Regular Expressions.” Then, you’ll be able to tell the serve whether you are redirecting a single page, a group of pages, or your entire domain.

  • Page: Type the page name under Pattern.
  • A Group of Pages: directory/(.*)
  • Entire Site: (.*)


Make sure the “ignore case” option is checked.

Now, move to the “Action Panel” and select “Redirect.” In the “Action Properties” type in your new URL. If it’s a single page, type in the new address. If it’s a group of pages or entire domain, type your new destination with a back reference, {R:0}. That reference keeps all page URLs intact with the new domain. It would look like this: http://www.newdomain.com/{R:0}

If you want to keep using the tracking parameters you’ve had on the old URLs, check “Append Query String.”

In the “Redirect Type” field, choose “Permanent (301).”

In the Actions column at the top right, click “Apply” to save. At this point, your rules are saved into your web.config file, which you can edit as needed.


Implementation Method 3: Creating a 301 Redirect in WordPress

There are several plugins to help you get this done, if you’re not too much of a techy. If you’ve got the premium version of Yoast SEO, there’s a built-in feature to help you. It’ll even tell you if the redirect you’re about to make will create a redirect loop, which effectively shuts down your website. Otherwise, you can use Simple 301 Redirects.


Implementation Method 4: Placing Code at the Top of Each Page

If you can’t modify everything on your server and don’t want to use a plugin, but your pages use ASP, Java, PHP, or another language that allows you to make changes to the response headers, place code at the top of each page to do your permanent redirects.

If you’re brand new to the world of SEO, redirects can be intimidating. But with this guide, they don’t have to be. If you have any questions or need any help with 301 redirects as part of a site migration, let me know.

Categories
Digital Marketing

Guide to HTTP Response Codes

HTTP status codes are a set of guidelines for how networking should work between systems sharing information. Most of us are familiar with 404 – because that’s what we see when we try to visit a page that’s no longer there. These codes are sent from the server where the website you’re visiting is hosted, to your computer. Many of them are created by errors accessing the website, rather than something that’s an issue with your computer or your web browser.

Web designers run into many of these status codes, as they should, since they were created for the benefit of designers and developers. Using the specific error codes, it’s much easier to debug to find the problem and fix it.

As a regular web user, most of these don’t matter to you – but educating yourself about them can help you know the difference between a problem with your web browsing, and a problem with a website your visiting. As a marketer, it helps to know some of these codes for SEO purposes – particularly those in the 300, 400, and 500 classes.

Without further ado – let’s take a look at all the codes and what they mean.


100 Class: Informational Status Codes

The 1xx codes are limited, because they represent operation at the connection phase. They’re sent during the connection, so they’re not the final status for the connection. These codes were not part of the first version of HTTP, and were added when 1.1 was adopted.

  • 100: Continue: This code signifies the initial response has been received and the full request will continue. You typically won’t see it when debugging, but will find it associated with most requests.
  • 101: Switching Protocols: This code comes into play when the server switches protocols to a different version of HTTP.


200 Class: Successful Request Status Codes

All of the 2xx codes mean the server requests are successful. The response varies based on the type of information sent, but regardless all codes represent a successful connection and receipt of information.

  • 200: OK: This just means the connection request was successful and the connection was made. Typically, it’s sent with a GET request to return some kind of information.
  • 201: Created: This code is a successful request after a new resource is created, like an HTML webpage.
  • 202: Accepted: The connection to the server was successful, but the response hasn’t been processed yet. It’s left open for other connections while an accepted response is processing.
  • 203: Non-Authoritative Information: This is similar to the 200 OK response, with the exception that the return information is coming from a different server. You may see this when you’re pulling from API data, or using a remote database or server farm.
  • 204: No Content: The connection to the server was successful and the information was accepted, but no information was returned from the server. There are several reasons this can happen, but all of the data transfer typically happens in the meta header.
  • 205: Reset Content: When someone submits content to the server, sometimes it will request a reset of the original document. You’ll see this status code from the server to the client when the document needs to be updated or reset.
  • 206: Partial Content: When you get this status, this is a partial response. It generally happens when there’s cached page content and the user only needs part of the page refreshed.


300 Class: Redirection Status Codes

The 3xx codes propose an update on the client’s side or a connection refresh. These codes relate to your web browser, but the refresh is usually automatic to adjust for new uniform resource identifier(URI) structures. When poorly implemented, the redirects can cause infinite loops, leading to constant refreshes until the server quits. If you’ve ever seen a “too many redirects” notice in your browser when a website refuses to load, these are the codes you’re dealing with.

  • 300: Multiple Choices: If the resource has moved to multiple locations, you’ll see the 300 status code with a list of options where you can obtain the requested webpage or resource.
  • 301: Moved Permanently: If you’re a web developer, you likely have some knowledge of this code. It is used to indicate a resource has permanently moved from one location to another, and is essential for changing a website from one domain to another, or making changes to a website’s URL structure. If you update a URL in WordPress, it creates a 301 redirect onto the old URL. If you’ve got a WordPress website, there are many plugins available to manage 301 redirects.
  • 302: Found: This is similar to a 301, but instead of being a permanent move, it’s a temporary move. So, when used, it tells servers the original URL is still active.
  • 303: See Other: When you see this code, the request successfully connected, but the response is found at a different URI. Each code should include the response URI in the header.
  • 304: Not Modified: If you’re loading a resource through cache, it will check to see if the document has been re-cached or updated since a certain period. If it hasn’t changed, the 304 means the content has stayed the same. This saves on bandwidth as cached resources don’t need to be sent over HTTP over and over again.
  • 305: Use Proxy: This represents a forced proxy connection. If there’s a webpage or other resource that can only be accessed through a proxy server, the 305code will return with a location header that contains the proxy URI.
  • 306: Unused: This code is not used in current HTTP versions, but was once used in older versions of the protocol.
  • 307: Temporary Redirect: This is similar to the 302 as they both represent temporary location changes. But, the 307 is more apt to handle continual updates to new URIs, on a more frequent basis, even though 302 could do it, too. At least where the general user is concerned, they are the same.


400 Class: Client-Side Error Status Codes

4xx codes represent client-side errors, which are generally the fault of designers and developers. However, not all of them are your fault, so there’s no need to panic or feel guilty. Instead, use them as an indication that something has gone wrong, and the fix is likely on your side, rather than the server side. The majority of these codes will also return information about the error so you can determine which page or resource is the cause of the error. Some messages will also indicate whether it is a temporary or permanent problem.

  • 400: Bad Request: This just means the server couldn’t understand the request, and its usually a result of a syntax error in the URI.
  • 401: Unauthorized: If you’re trying to access a file that is password protected with information stored on the server, and don’t have the right username/password, you’ll get this error.
  • 402: Payment Required: As of right now, this is not in use, and seems to be reserved for use in the future.
  • 403: Forbidden: This is much like the 401, except you cannot grant yourself access. This usually happens when a webmaster blocks certain folders or files from being visible over HTTP.
  • 404: Not Found: When you get this error, the page or resource can’t be found at the current location, and has no redirect or known location in place to direct you to where you can find the file. It’s a sign the file has been moved or deleted from the server.
  • 405: Method Not Allowed: This status code is associated with the backend development of a website. It means the request method cannot be accepted, with the most common ones being GET and POST.
  • 406: Not Acceptable: This relates to how information is returned. The server accepted the information, but the response cannot be sent. This typically happens when the client or browser doesn’t support the response.
  • 407: Proxy Authentication Required: This is similar to a 401, but it requires authentication though a proxy server.
  • 408: Request Timeout: Servers are programmed to wait a certain length of time for a response from the client server. If the connection takes too long, you’ll get this error. Sometimes, this can be fixed by waiting a minute or two and then refreshing the page.
  • 409: Conflict: You’ll get this error when the requested resource needs to be edited, but doesn’t have the permission to do so. If a file should be moved or deleted but the connection doesn’t have permission, this status will come up.
  • 410: Gone: This is more specific version of the 404 code. It means the resource has permanently moved and is not expected to return to the URI, but there is no indication of where it may be found in another location.
  • 411: Length Required: Though rare, this deals with the “content-length” header. Some return content may require a certain length before the request can complete. If you get this error, fix it by passing a content-length header into the request.
  • 412: Precondition Failed: If some information passed into the request-header is incorrect, you’ll see this code. The server evaluates the information and will often come back with a message that helps you see where the issue is.
  • 413: Request Entity Too Large: If the request is more than the server can handle, you’ll get this return code. Your server setup should dictate the largest possible file size, and you won’t see this if you don’t exceed that size.
  • 414: Request URI Too Long: The URI passed to the server is too long, you’ll see this error. Though not common, if there are too many parameters attached to the end of an URL, it may be too long. The only way to fix it is to address the website’s code.
  • 415: Unsupported Media Type: This is also a rare one, but it can appear if you’re passing data that can’t be supported by the server. You’ll see it if you’re using an unsupported audio or video file type, for example.
  • 416: Requested Range Not Satisifiable: This happens when the range request header doesn’t get a long enough response from the server. This happens when the server can’t access the full range of data.
  • 417: Expectation Failed: When you see this error, the expect request header cannot be handled by the server. The responses are vague, so it can be difficult to address this error code.


500 Class: Server-Side Error Status Codes

All 5xx codes represent errors on the server’s end of the connection. Some of them may provide additional information, but they’re not always understandable from the user’s end. Think of these errors as serious issues to address with the server administrator or your web hosting company.

  • 500: Internal Server Error: Chances are as an internet user, you’ve seen this at least once in your life. It means there’s an unknown error on the server and it cannot complete the request.
  • 501: Not Implemented: If the sent request to the server contains a functionality that’s not installed, you’ll get this error in turn. This can happen for several reasons, including a lack of software or backend languages.
  • 502: Bad Gateway: This error is more common in large networks. If a server can’t be connected or is invalid, then you’ll get a bad gateway error. It’s a complex networking issue and has nothing to do with the client.
  • 503: Service Unavailable: When this happens, the server is either down for maintenance or overloaded with traffic. The server can’t take on anymore connection requests.
  • 504: Gateway Timeout: In this case, your connection is successful, but the server is acting like a proxy and that response is taking too long. Sometimes you can fix this by waiting a minute or two and then refreshing.
  • 505: HTTP Version Not Supported: If you send a request with an unsupported version of HTTP, you’ll get this code. You should also see a message that tells you which versions are supported.


Status Codes are Essential, But Not for Everyone

You don’t have to memorize these codes, but as a designer or developer, it may be helpful to do so. Chances are unless you’re in the field and working with HTTP every day, you’ll never see any of these codes.

Categories
SEO

8 More Solid Link Building Methods

Last week, I wrote a post with 9 solid link building methods to help you strengthen your SEO. This week, I decided to continue that with a list of eight more options. Even with the 17 of them together, there are still countless other ways you can build links. Some are fairly quick, while others will take time and effort before you really start to see the effects. I recommend you use a combination of all the methods so you’ve got some constant link building effort going on.

1. Start a Blog

Adding a blog to your website gives you a way to consistently create content on a regular basis. It builds internal links, because you can use previous blog posts as reference points for your readers. Not only this, but it lets you naturally attract links to your content. The blog itself isn’t going to build links, but what you do with the blog that will. If your website is built on WordPress, you’ve already got the structure you need to start a blog, so what are you waiting for?

You can then submit your blog to various blog directories. But, it’s important to remember that not all blog directories are created equally. Some will pass great value, while others won’t really offer much.

2. Contribute to Other Blogs

Bloggers sometimes struggle to create content on a regular basis. To make up for the difference, bloggers often accept guest posts from other bloggers to fill in the gaps. You can pitch those bloggers to ask if you can guest post. You can get a link from the post, and you can drive traffic from the post to your website.

You can search for “niche+guest posts” or “niche+write for us.” Visit the websites you’re interested in contributing to, and add them to a spreadsheet. This way you can make notes about topics you’d like to pitch, and keep track of who you’ve already pitched and who has responded. This way you can make sure you’re on a schedule you can keep up with.

If you’re not finding as many as opportunities as you’d like, there are platforms to help connect you with bloggers who are specifically looking for guest posts. Check out My Blog Guest and Blogger Link Up to get started. There are some who say guest blogging is dead. If the links to your blog aren’t dofollow, you won’t get any juice from the domain, but it can still be a good way to expose your blog to new audiences.

When you write a guest post, keep these things in mind:

  • Write quality content – take your time with it, and make sure it has something of substance for the audience.
  • Don’t include your link in the article itself unless it fits contextually – the blogger will include it in a bio for you.
  • Have multiple, useful outbound links in your posts – don’t just think about your target site.
  • Link to other blog posts internally, to help the blogger you’re guest posting for, too.
  • Include images and/or video where appropriate.

3. Promote Your Content on Social Media

People aren’t going to link to your content if they don’t see it, so social media will play a key role in helping you promote your content. Not everyone will link to your content, so it’s important to get the content in front to the right people.

But the last thing you want to do on social media is constantly toot your own horn. If that’s all you do, people aren’t going to pay attention to you anymore. A good rule of thumb is to share eight or nine other pieces of content that don’t originate with you, for every one of your own. It’s okay to schedule multiple tweets and posts with the same content, as long as you’ve gotten some space between them.

4. Build Relationships with Others

Taking time to build relationships with others, online and in person can help you build links. It’s true you may not directly get links from the relationships you build, but you never really know. Over the long term, you can expect a portion of those relationships to turn into links. So, how can you build the relationships you need?

  • Participate: Participate in surveys if someone in your network is looking for people. Find and engage in Twitter chats relevant to your niche or industry. Be active in groups and communities where your customers are found.
  • Network at Conferences: Go to conferences for your industry to connect with people face to face. Search the conference beforehand to connect with attendees on Twitter, so you can take the online conversation one step further in person.
  • Really Interact with Them: Show them you are more than a picture. When someone posts about their kid’s birthday, share your happy birthday wishes. If their son just graduated high school, congratulate them.
  • Random Acts of Kindness: Be nice to others as often as you can. Always look for ways to help, because you never know when someone may be able to return the favor. That doesn’t mean you should act with the expectation of something in return, however. Just be nice and wait for the karma to come back to you.

5. Use Images to Your Advantage

Images are often overlooked as a source of links. People everywhere are looking to find relevant images to use in their content, and you can take advantage of that, if you have quality images you’re willing to license.

When people use your images, you’ll get an attribution link in return – if they’re honest. Always have your camera, especially if you’re at an industry event. If you take 100 photos and only publish half of them on your site for use, there’s good back linking potential there.

If you’re not much of a photographer, you can create quote graphics with a tool like Canva and ask that people provide attribution in exchange for free use. If you generate a lot of images, you may want to add a media gallery to your website. Then, do some image SEO so you they rank for various image search queries. If people steal them, don’t panic. You can always reach out to them and ask them to include a link. Make it easy for them by including the necessary HTML they need to include a link back to you for them to copy and paste.

You can do the same thing with video. Just build up a library of them and make them available for webmasters to embed them. Include your attribution link in the embed code so you get the back link.

6. Write Columns on High Authority Websites

Rather than looking for guest blogs to contribute to, you can look for authority websites in your niche to become a regular contributor to. The high authority websites in the business arena, like Entrepreneur, Forbes, Inc., and various others are hard to gain authorship on, but can help you build credibility. Not only this, but they have high traffic volumes to expose your column to thousands of readers.

7. Use Help a Reporter Out

Help a Reporter Out is a resource for journalists to find sources for upcoming stories. When you sign up, you can find a list of things people are looking for sources for, so you can secure coverage for your business. Check the platform daily and subscribe the relevant niches so you can get alerts accordingly. Pay attention to the details of the request, and be quick to respond with what the reporters are looking for. Remember, just because you respond to the journalist doesn’t mean you will hear back. They are busy people with deadlines, just like you. Even if you don’t get a response, keep trying. You’ll eventually get coverage and even if you don’t, you can build relationships that may be beneficial later.

8. Crowdsource Posts

Getting answers from a group of industry experts can attract links. When you’ve got a great piece and some influencers to help you spread it around, you can attract an exponential number of links. The experts mentioned in the article will do a lot of promotion for you.

Look for people who are crowdsourcing their posts, too. This is another place where building those relationships comes in handy. When you become an expert mentioned in one of those posts, you can promote it to your audience, and get exposure from a new one. You’ll get a link back to your site with your quote or contribution to the piece, as well.

Build Link after Link After Link – Naturally

Link building is a task some people love, and some people hate. It takes time, and Google knows this. Of course, you want to build as many links as possible, but don’t stress about the speed at which they’re built. Too many too quickly, and your hard work could backfire.

At my agency, Sach’s Marketing Group, SEO is what we do. And link building is a major part of that effort. If you find you’re one who hates it, get in touch. We can help you build the right kind of links at the right pace, so you can focus on the things you really enjoy.

Exit mobile version